


Watch the full video above for a step-by-step walk through of how to measure for your screen porch project.
1. Start With the Basics: Why Measurements Matter
Every successful screen porch project begins with accurate measurements. No matter which screening system or materials you choose, precise dimensions ensure everything fits correctly, installs smoothly, and looks professional. Taking the time to measure properly upfront reduces waste, prevents rework, and gives you confidence as you move into material selection and installation. Your entire porch project depends on one thing: Accurate measurements.
Getting this right upfront ensures:
- Proper material estimates
- Smooth installation
- A clean, professional final look
2. Understand the Two Key Terms: Sides and Zones
Before measuring, it’s important to understand how your porch is structured using two key concepts: sides and zones. Most porches have two or three sides, and each side can be divided into multiple zones depending on the layout. Zones are simply sections within a side—such as areas with a door, guardrail, or different framing—that may require different measurements.
Sides
- The full width and height measurement of each side are the most important measurements
- Each side is measured separately
Zones
- Zones are sections within each side
- These can vary depending on your design
Example:
One side might include a door opening, while another is fully screened.

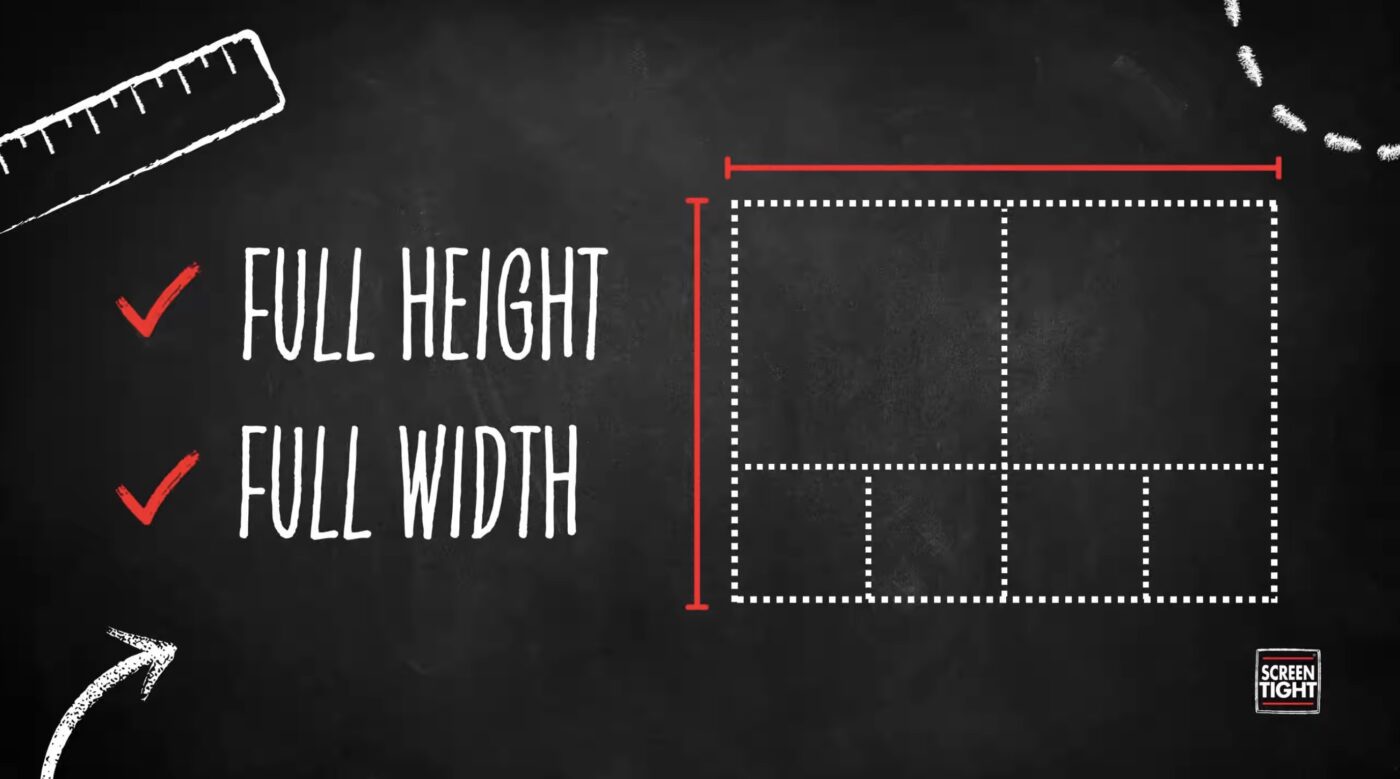


3. Measure the Full Height and Width First, then Zones
Porch screening is all about linear measurements, and the best place to start is with the full height and full width of each side. These are the most important and easiest measurements to capture, as they define the overall structure of your porch. In many cases, these two dimensions alone can provide a solid estimate for materials when selecting a screening system.
- Full Height (top to bottom)
- Full Width (left to right)
These two measurements alone can often get you close to estimating materials.
Then identify and measure zones within your sides. These are the areas that are not the full height of your sides.
Focus on:
- Guardrails
- Header / Pitch Areas
- Sections with different vertical supports
For each zone, measure:
- Zone height
- Any vertical framing within the zone
4. Add Up Your Linear Measurements
At its core, measuring a screen porch is simply about adding up linear dimensions. By combining the full height and width measurements with any additional zone measurements, you can calculate the total linear footage for each side. This straightforward process allows you to break down even complex porch designs into manageable numbers.
You’re just adding up linear inches (or feet).
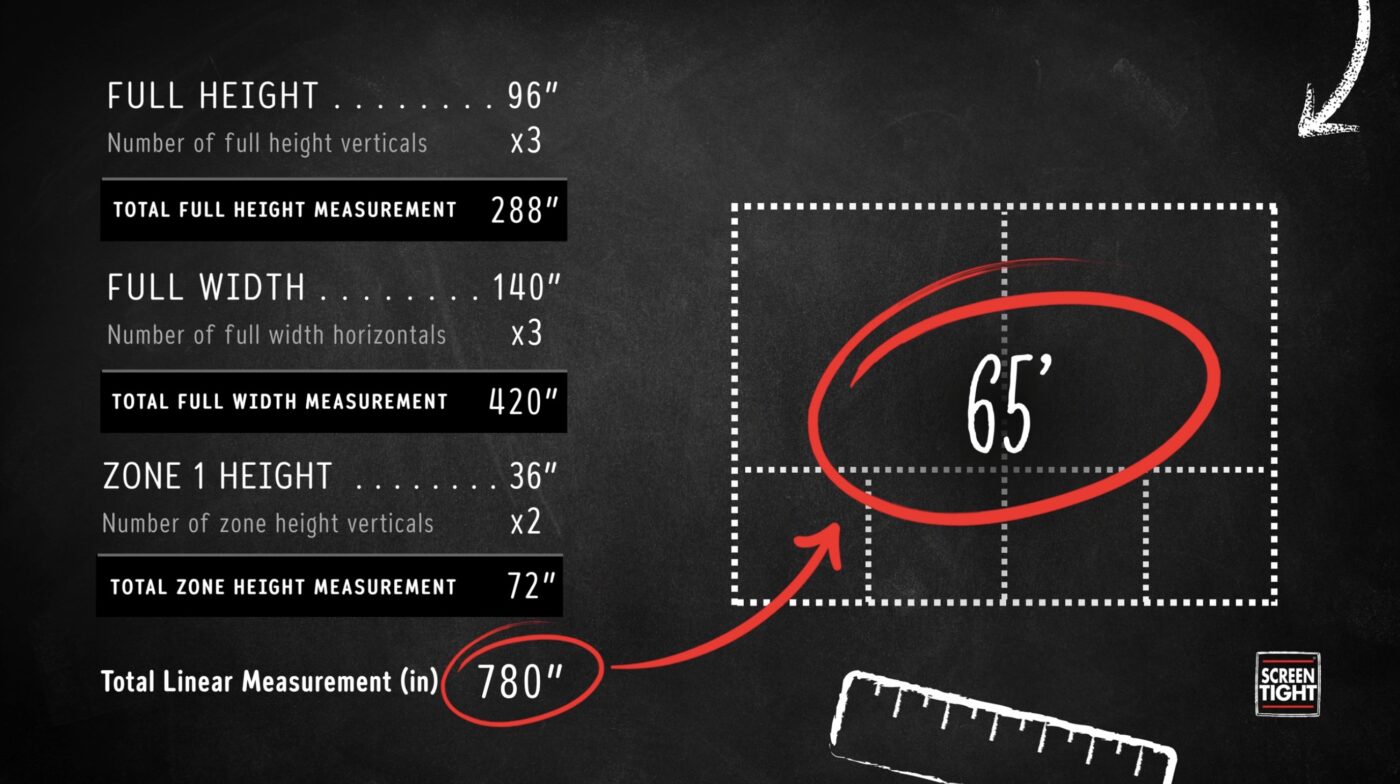
Example Breakdown
Let’s say you have:
- Full height = 96 inches
- Full width = 140 inches
- One center vertical
- A lower guardrail zone (36 inches high) with two verticals
Step-by-step:
- Multiply full height by 3 (left, center, right)
- Multiply full width by 3 (top, middle, bottom)
- Add zone-height verticals
Final Result:
- 780 total inches
- 65 total feet

5. Convert Measurements Into Materials
Once you’ve calculated total linear footage, the next step is converting that number into the materials you’ll need. Most screening systems use standard component lengths, so you simply divide your total measurement by the component length and round up. This gives you a clear estimate of how many pieces are required to complete your project.
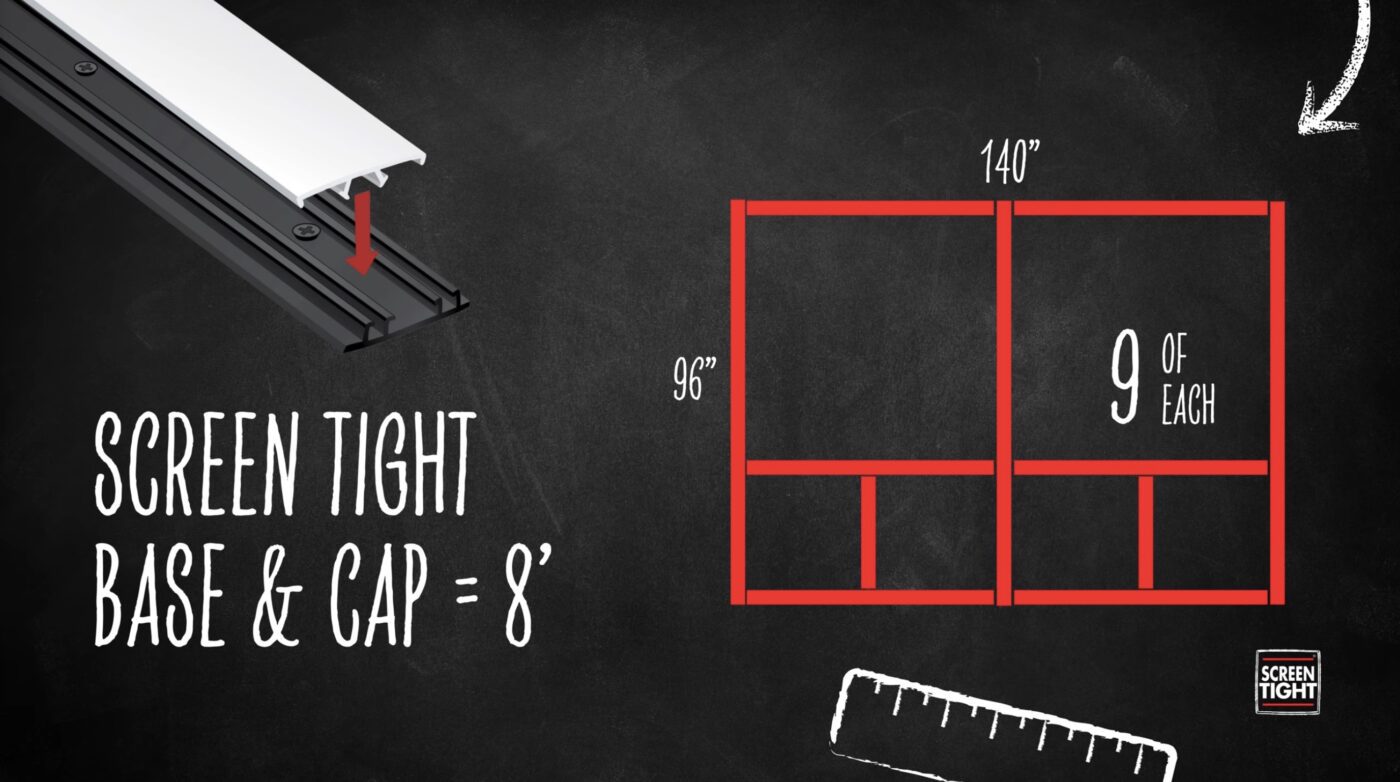
Example (Original Screen Tight System)
Standard base and cap components come in 8-foot lengths.
Calculation:
- 65 feet ÷ 8 = 8.125
- Round up → 9 pieces needed
You’ll need:
- 9 base pieces
- 9 cap pieces
Final Takeaways
While the measurement process stays consistent, every porch has its own unique layout and features. Some may include doors, multiple zones, or custom framing details that affect how measurements are taken. Because of this, it’s important to approach each project individually and ensure your measurements reflect the specific design of your porch.
Every Porch is Different:
- Consider doors
- Unique layouts and angled pitches (round up)
- Using multiple screening systems (MeshGuard below the rail)
That’s why:
- Measurements must be customized
- Product choice may vary
Double-check all dimensions before ordering materials
Measuring your screen porch comes down to three things:
- Understand your sides and zones
- Capture full height, width, and zone heights
- Add everything into total linear footage
Once you’ve done that, the rest of your project becomes much easier.
Happy screening!